Now think about it, what would be the ideal hobby for an aging yuppie/hippie/techo-geek? Probably something fairly expensive, that involved both raw collecting (things for their own sake) and using the things to make something. Letterpress printing was like that. There was lots of stuff that had to be bought: the press itself and its mechanical accoutrements, and the type collections, which had to be sorted, stored, and sampled. All that stuff could be used to actually produce something. In my case it was poetry, broadsheets and chapbooks when I got really ambitious. And setting type is just the sort of persnickety, delicate, marginally difficult, frustrating semi-artistic and rewarding task that drives me nuts in a more or less rewarding way. I still do it. It makes me crazy. I like it.
So, z-scale model railroading. I'd see these little briefcase-size layouts in fancy catalogs, and imagine having a little layout ruining on the bay windowsill in my office. The ready-made layouts are very expensive, and sort of over-decorated, and represent somebody else's imagination, not mine. Still, I could have just bought one, but no...
Instead I hit the web, did a little research and shopping. I discovered that z-scale is one of the smallest commercial model railroading scales (1:220) and that most of the stuff came from an outfit in Germany called Märklin, now bankrupt, and that now there were lots of interesting American manufacturers. The trains are expensive, small, persinckety, delicate, collectable and they work. The track is small enough that I can work with in in a corner of my office (although the smallest possible circuit layout will NOT fit on my windowsill, alas) and it just soaks up money, and time. And the reward? The trains go 'round (and over and through) and I can take pictures, make movies, create new layouts, figure out switches and block control. There's stuff to buy and sell on eBay, database programs to write to track it all, little closed worlds to create and operate, and plenty of frustration working with these tiny little machines. What more could one ask?
The good? Well, they're small, they're gorgeous and they work.
It's not a perfect world, however, and z-scale model railroading has many 'issues.' For all manufacturers the scale itself is the biggest problem. It's hard to be really accurate, especially in mechanical things that have to work (like couplers on the cars.) Wheels are always out of scale, other wise they'd be too narrow and the flanges too small to hold the cars on the track. The actual engine chassis (with their motors, electrical pick-up systems and drive wheels) are generally standardized rather than customized for each model, and the cast body shells usually have various compromises in design so they can fit on the standard chassis.
Since the stuff is really small and very light. it's hard to maintain performance. After all, a cat whisker across the tracks can practically stop an engine. Furthermore, at this small scale, only very low speed operation is really true to scale ('prototypical' to use the jargon of the hobby) and the delicacy of the engines and inevitable mechanical imperfections in track, switches and the like, make smooth low-speed operation almost into the holy grail: an unreachable ideal.
Märklin's couplers, the things that link the rolling stock together into a train, were large, out of scale and didn't look 'real.' They're fairly simple and reliable, but hardly 'prototypical.' An American outfit, Micro-Trains, that features couplers which are more to scale and which look and act more like the so-called knuckle-coupler on real trains. They're also to be harder to use and less reliable, and you can't mix and match. Neither style coupler can match the true scale intercar distance of a real train, although the larger Märklin couplers seem to actually keep the cars closer together. MicroTrains used to let other boutique manufacturers use their couplers and they used to manufacture a flavor of coupler which was compatible with Marklin's. As of this writing (2009) they no longer let other manufacturers use their couplers, and a third manufacturer, American Z Lines, has entered the market with their own 'knuckle' style coupler, which are compatible, sort of, with Micro-Trains' couplers.
Märklin switches (points, turn-outs, you pick the term) were the first on the market, buy they're kind of klutzy; they don't look real, they can easily cause a slow-moving train to stall or a fast-moving train to de-rail, and they're rather limited in available geometries. Various obscure European manufactures make more elegant switches, some with alternate geometries and configurations, some just matching Marklin. Micro-Trains has entered the market with its own line of switches which are part of a new line of track they've introduced which incorporate a rather ugly snap-together plastic roadbed. Their switches are more precisely engineered than Marklin's, but that makes them even less tolerant than Marklin's of variations in wheel gauge, loose pilot wheels, and so on. I have a whole separate page on MT track and switches.
The past history of American manufacturers who have entered and left the Z-scale field is interesting, and maybe someday someone will write it. I can only summarize by saying that some small, boutique and hobby efforts have evolved into two major American sources, Micro-Trains and American Z Lines, and various continuing boutique, hobby scale efforts. If you dig a little into the people involved, you'll find a soap opera of past and present relationships, which I don't know enough about to comment on.
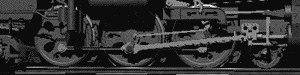
Märklin was a German company; the scale was popularized in Europe. Most of their available Märklin engines and rolling stock were based on German and other European prototypes. That's fair, I suppose, since most of the real-world railroad activity is in Europe. But if you like American diesels, and passenger rigs, you have more choice if you buy from Micro-trains or one of the boutique manufacturers. American steam engines were almost the exclusive domain of Märklin, probably because of the difficulty of precision manufacturing the coupled driving wheels. Even then, there were only two of three basic chassis available, and prototypical accuracy was not their strong suit. The latest American steam models available are brass, and expensive.
These days most of the American manufacturers all concentrate on more modern diesel locomotives. and there's a good selection available. Since these engines are the latest designs, they tend to run well, much more quiet and smoother than older models.
Z-scale passenger cars look a little strange on the relatively tight curves that are featured on most z-scale layouts, but lately (2009) there's a minor run on new passenger cars being released by American manufacturers.
Japan has entered the market with some intriguing z-scale sets, including formed and lighted layouts, and several available train sets. The cars and locos all look pretty Japanese, but they have vocal advocates who praise the quality of their engineering, as well as their relatively reasonable price point.
The thing is that up until a couple of years ago most of this stuff was from Europe, and looked like it. If you were into z-scale, you learned to live with it, or stuck with Micro-Trains and 'scratch-built' scenery. But Marklin may fail altogether, or exit the Z-scale market (either of which are possible,) and in any case the American and world-wide market seems to be expanding.
Unlike real railroads, model railroads often run in circles or ovals, or variations thereof. Track circuits (called layouts) can be made of two basic types of model railroad track: sectional, and hand laid. You have several options here, staring with the most common form: s
Standard 'sectional' track in fairly small pieces that follow a few standard geometries (in length, curve radius, etc.) The pieces can be combined into fairly complicated layouts, something like a flat erector set. With the right speciality pieces (often called 'adjustment' tracks you can be creative within the established geometry.
A drawback of sectional track is that because the pieces are relatively small there are lots of mechanical joints to get just right. Those joints also provide an opportunity to divide the track electrically, for so-called block control, and that's a good thing. They also can loosen and cause potential stalling or de-railing, both bad things.
Another track option is called flex-track. Longer pieces which can be bent into longer, smoother and/or more complex curves. It's usually cheaper by length, but you have to work harder, and of course it removes that comfort zone of 'standard' geometry. Märklin flex track is notable for not being very flexible (unless you nip out the occasional plastic tie.) Other manufacturer's flex track don't match the Märklin look. Pick your poison. But flex track is often the only solution for any but the most rigidly defined small layouts, and is always the only solution for larger layouts with realistic, wide sweeping curves. Small sections of flex track can also be used to make your own 'adjustment' track for a layout otherwise made of sectional track.
Hand-laid is just what it says. You buy strips of metal track and lay them down on ties, build your own switches, and create your own mechanical and electrical connections. You also must lay whatever track bed you want to use, and (usually) apply ballast over the track. Just like the big boys. Large layouts with long straights and gentle, sweeping curves are often hand-laid. You must use a gauge to maintain the gauge, and use little tricks like widening the gauge and/or super-elevating (very slightly tilting) a bit on curves, and generally just drive yourself nuts. But it comes out great, so they say.
Märklin invented Z-scale, and their geometry for sectional track became the defacto standard: curves in three radii, a standard track length of 110mm, straight switches with 13° diversions and matching 13° return curves, and curved switches to match the two largest curve radii. Märklin track came bare, with no roadbed attached. They made a rather long but not very flexible flex track, and published layout booklets that showed how the geometry of the stuff worked to create parallel curves, switching yards, and so on. There were also a crossing track, specialized feeder tracks, tracks with embedded switches for activation block control, and block control tracks with electrical gaps.
When the Americn firm Micro-Trains came into the market and wanted to sell 'ready-to-run' train sets, they packaged Maerklin track with their own locomotives and rolling stock. Micro-Trains also developed their of flex track, however. It came in shorter pieces than Marklin's, and the tie spacing was closed, more like real North American track.
A few years ago Micro-Trains decided to develop its own line of sectional track, following Märklin's sectional geometry but adding permanently affached plastic roadbed. This type of roadbed sectional track was common in larger scales. Plastic roadbed was a lot less 'realistic' than cork or other materials and an overlay of real ballast, but it made simple, snap together layouts look a little better, and the plastic connectors in the roadbed added to the metal electrical connectors on the rail ends to make connections a little easier as well.
For whatever reason (and there is plenty of specularion about problems with their supplier, a lack of investment and/or enthusiasm from the company owners) The line has never been filled out. The basic pieces following the larger two Märklin curves and simpler pieces of straight track are available, but a lot of the completer and adjustment, and control pieces were never released. Micro-Trains also produced their own straight switches which had a mixed reception in the market place, but no curved switches or special crossings.
Micro-Trains did produce a unique piece, a decoupler section which was a normal straight section with at attached magnet. This section could be used with their patented 'magne-matic' couplers for realistic, hands-off coupling and decoupling or cars and locos. Maerlin made a de-coupler, but it was an electro-mechanical device adapted to their owbn unique couplers.
As of this writing (in 2011) Micro-Trains track is widely used, but limited in its geometry and offering no 'specialty' tracks except a feeder. A couple of years ago I wrote this separate little screed about Micro-Trains roadbed track.
This year a Japanese company called Rokuhan has entered the Z-scale market with a bang, debuting their own line of sectional track. Physically it's similar to Micro-Trains' track, and it starts with the same basic geometry as Märklin. But Rokuhan's line is far more complete than Micro-Trains, and goes beyond the Märklin geometry with a greater variety of curves, both wider and tighter than anything available from Märklin. They've also come out with their own switches, with a sleek new mechanism and unique electrical setup.
They've published a clear set of specifications of what they expect to release, and, although not everything has been released and not everything that has been released is available in America, they're making steady progress and their track is receiving good reviews.
I've put together a little table of the most common track sections, showing the Rokuhan, Märklin and Micro-Trains part numbers. Blanks indicate sections not available from that manufacturer, shaded part numbers from Rokuhan are unreleased or unavailable in America. The table omits feeder tracks, decouplers and other specialty tracks.
![]()
|
Track |
Rokuhan |
|
Märklin |
|
Micro-Trains |
|
|
|
|
|
|
|
|
490mm radius 13° Curved Track |
R012 |
|
8591 |
|
990 40 912 |
|
270mm radius 30° Curved Track |
R015 |
|
|
|
|
|
245mm radius 30° Curved Track |
R014 |
|
|
|
|
|
220mm radius 45° Curved Track |
R004 |
|
8530 |
|
990 40 913 |
|
220mm radius 30° Curved Track |
R033 |
|
8531 |
|
|
|
195mm radius 45° Curved Track |
R002 |
|
8520 |
|
990 40 904 |
|
195mm radius 30° Curved Track |
R032 |
|
8521 |
|
990 40 903 |
|
170mm radius 45° Curved Track |
R003 |
|
|
|
|
|
145mm radius 45° Curved Track |
R005 |
|
8510 |
|
|
|
127mm radius 26° Curved Track |
R019 |
|
|
|
|
|
120mm radius 45° Curved Track |
R011 |
|
|
|
|
|
95mm radius 45° Curved Track |
R010 |
|
|
|
|
|
70mm radius 45° Curved Track |
R018 |
|
|
|
|
|
|
|
|
|
|
|
|
110mm Straight Track |
R001 |
|
8500 |
|
990 40 902 |
|
108.6mm Straight Track |
*** |
|
8506 |
|
|
|
112.7mm Straight Track |
R031 |
|
8507 |
|
|
|
110-120mm Straight Track |
8592** |
||||
|
220mm Straight Track |
R009 |
|
8505 |
|
990 40 917 |
|
53.6mm Straight Track*** |
R024B |
|
|
|
|
|
55mm Straight Track |
R008 |
|
8503 |
|
|
|
25mm Straight Track*** |
R025B |
|
8504 |
|
|
|
Bumper Track |
R013 |
|
|
|
|
|
|
|
|
|
|
|
|
Remote Left Turnout |
R006 |
|
8562† |
|
990 40 914 |
|
Remote Right Turnout |
R007 |
|
8563† |
|
990 40 915 |
|
Remote Left Turnout 2 5/32” |
R022 |
|
|
|
|
|
Remote Right Turnout 2 5/32” |
R023 |
|
|
|
|
|
Remote Curved Left Turnout |
R026 |
|
8568† |
|
|
|
Remote Curved Right Turnout |
R027 |
|
8569† |
|
|
|
Flex 660mm |
|
|
8594 |
|
|
|
Flex 330mm |
R016 |
|
|
|
|
|
Flex 137.5mm |
|
|
|
|
990 40 901‡ |
|
Flex 135mm |
R017 |
|
|
|
|
|
Crossing 53.6mm – 13° |
R024A |
|
8559 |
|
|
|
Crossing 25mm – 90° |
R025A |
|
|
|
|
|
Double Slip 13° Turnout |
R034 |
|
8560 |
|
|
** The 8592, which can be stretched from 110mm to 120mm or any length in between, is unique to Märklin.
***The 53.6 mm track, part of it the R024 crossing set, would combine with a 55mm straight to produce a 108.6mm straight. It is unclear, however, if the 53.6mm track will be available as a separate piece. It is also unclear if the 25mm track, part of the 90° crossing set, will be available as a separate piece.
† Marklin also produces 'manual' switches without the wiring for remote control.
Micro-Trains and Märklin flex track is not roadbed track; Rokuhan is.
Märklin and Micro-Trains both produce 'feeder' straight sections with built-in electrical connections. Rokuhan's 110mm and 220mm straight tracks all have removable sections of roadbed which permit attachment of their proprietary track connector.
![]()
Z-scale, like HO, runs on DC current carried in the track: one rail positive, the other rail negative. Locomotives pick up the current through their wheels, and motor speed is directly proportional to the strength of the current. Reverse the polarity of the current, and you reverse the direction of the motor.
There is an alternative way to feed the current: catenary. [Catenary is a great word (see this link)] In railroading catenary refers to systems of over track wires which distribute power. Overhead pantograph fixtures on engines make contact with the catenary. Z-scale catenary systems carry one pole of the DC, combined with one rail track. Engines can draw power from the rails, or through the pantograph, but not both at the same time. I don't have any pantograph-equipped engines or catenary-supported track, yet. In this realm, most of the stuff that's made by Märklin, Viessmann and other manufactures, and looks very German.
Accessory lights, switches and other non-motive systems generally use a separate AC feed. The single transformer usually provides both the constant AC accessory feed and the variable DC feed for the track or catenary. These days a lot more LEDs are being used, both to replace operating lights on engines and for layout illuminations. Some of the locomotive modifications require their own little electronic boards to operate off standard track power, and that makes them a bit expensive, but they really improve the look of the locos. Older filament bulbs barely glowed at the low-voltages used for low-speed operation, whereas the LEDs shine nice and bright.
DC straight to the rail seems neat and simple, except that it means ALL locomotives on any given section of track powered by a single transformer will ALL travel in the same direction, hardly 'prototypical.' You can overcome the single track/single direction problem by mixing catenary engines and rail-supplied engines and using separate transformers as power supplies for each, but that gets complicated.
A lot of modern model railroad enthusiasts have switched from simple electronics to a more sophisticated method that feeds a constant DC current to the track and engines, and uses tiny micro-circuits in the engines to control motor speed (and direction) while keeping engine lights constant. Other processors control the AC power for switches, scene lighting, and so on. These digital control systems can be computer driven, or can use dedicated, stand-alone controllers.
In the digital world of model railroading, even in z-scale, there's real competition, and Märklin was on the losing side. They used a proprietary system with chips from Motorola, while everyone else uses a system with components based on a standard called DCC. In any case, and unfortunately, the little receivers that are required in each engine are only starting to be miniaturized down to z-scale. Of course, if you have a steam engine you usually have room to stick a standard controller in the coal tender and wire it back to the locomotive.
I've experimented with digital control in a couple of HO models I own but I've been waiting for the state of the art to improve a bit, and the standards to get more established, to convert any of my Z-scale stuff. Until then it's hands-on transformers and switch boxes and control gizmos, and occasionally hands-on the little engines themselves to nudge them through a switch when that low-speed just won't pull them through (the hand is also known as the 0-5-0 switcher.)
![]()
[This section was is out-of-date. I'm working on a gala new page full of pictures and videos and inspirational chatter...]
Alas, after doing a lot of Flash conversion a few years ago, I'll have to convert again as Flash support disappears. It will take some time, I fear Meanwhile, the old links will take you, well whereever...
![]()
My collection of actual trains has grown and shrunk over time. I over-acquired in the beginning, then sold off a lot of stuff I found I wasn't really interested in. Now that I'm retired, I'm buying withy slightly more selectivity, and after another couple of years I'll probably do another sell-off of stuff I don't ever run or display.
Visit this page to see some fairly primitive movies or trains running around my layouts, or for detailed (sort of) current inventories see:
![]()
![]()
This document maintained by rgm at
fabbnet.net.
Material Copyright © 2001 - 2011.